As we move through 2024, those who work within the digital marketing industry should expect the platforms we advertise on to continue to increase the online privacy of those who search and browse on the web. Over the years we’ve seen more and more privacy guidelines and regulations take action, which often leaves marketers in a constant state of adapting and maneuvering. Never a dull moment in the land of PPC!
Uploading Customer Lists: A Step-by-Step Guide on How to Upload Email Lists into Google Ads, Facebook (META), and LinkedIn
We realized early on, having clients in Europe, that data privacy concerns would likely never cease and would only grow. When GDPR (General Data Protection Regulation) took effect in 2016, we quickly had to decide how to handle the customer data that clients would send us to utilize in PPC campaigns.
With the growing concern about online privacy, we ultimately decided the safest route, for both us and our clients, for utilizing consumer data would be to have the clients upload customer lists into each advertising platform.
Consistently finding and sending step-by-step guides, that are up to date when platforms are in a constant state of change, on how to upload customer lists into Google Ads, Facebook (Meta), and LinkedIn has become monotonous, so I’ve compiled them here.
Google Ads Customer Match List: Step-by-Step Guide
A quick reminder that data segments need to be above a certain size to serve on the following:
Display must have at least 100 active users to serve
YouTube must have at least 1,000 active users to serve
Search must have at least 1,000 active users to serve
Create Your Customer Match List
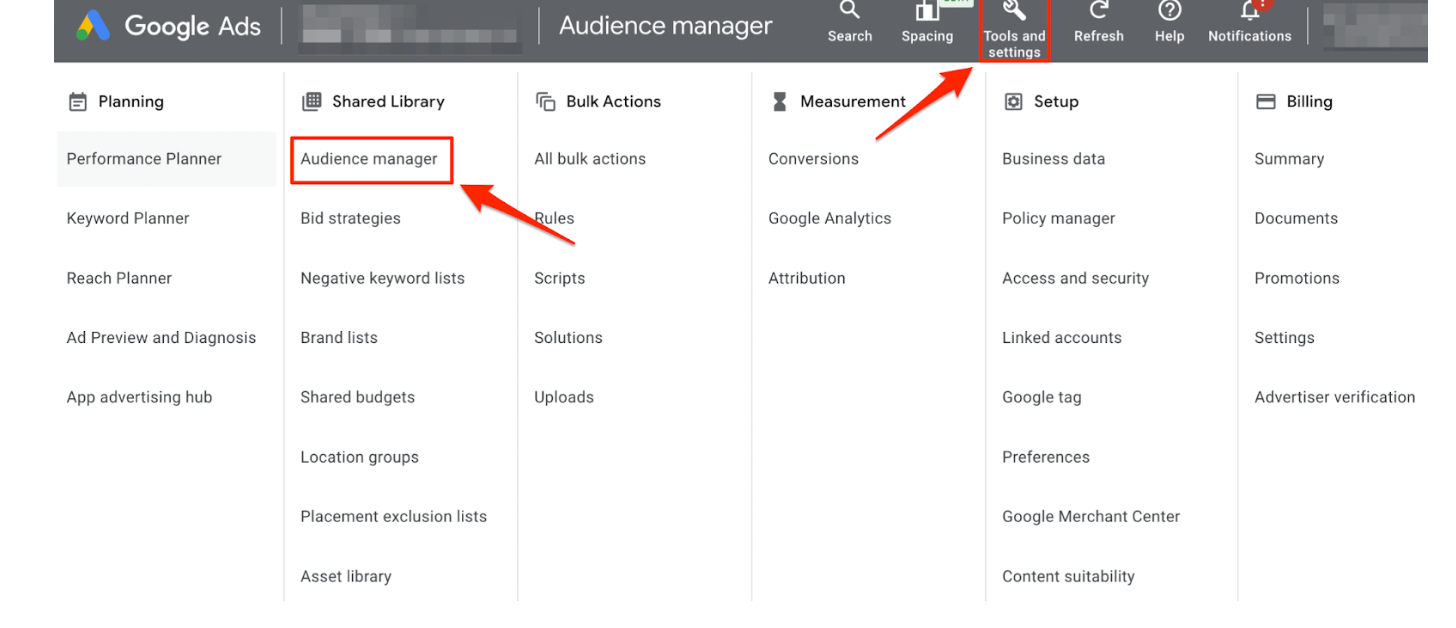
While inside Google Ads you’ll want to select Tools and Settings, and then Audience Manager.
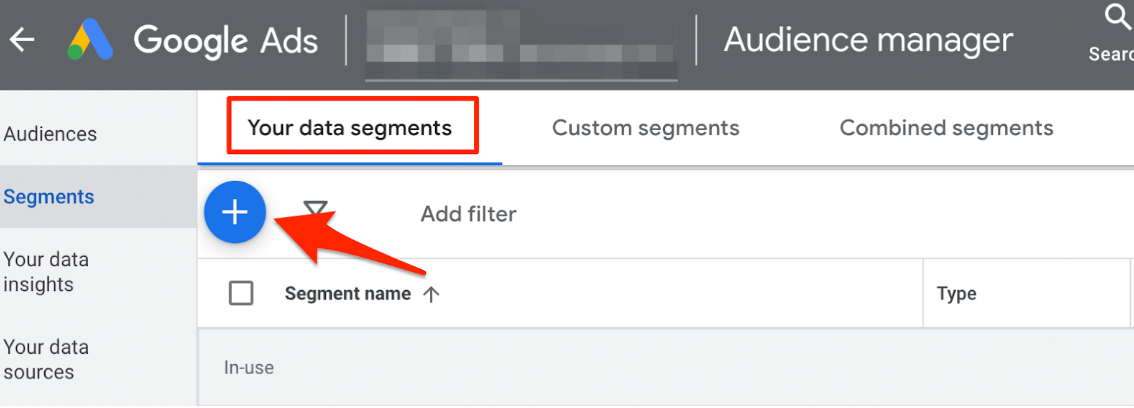
Google should automatically take you to Your Data Segments but make sure to navigate there, and then click the big blue button to create a new Customer List segment.
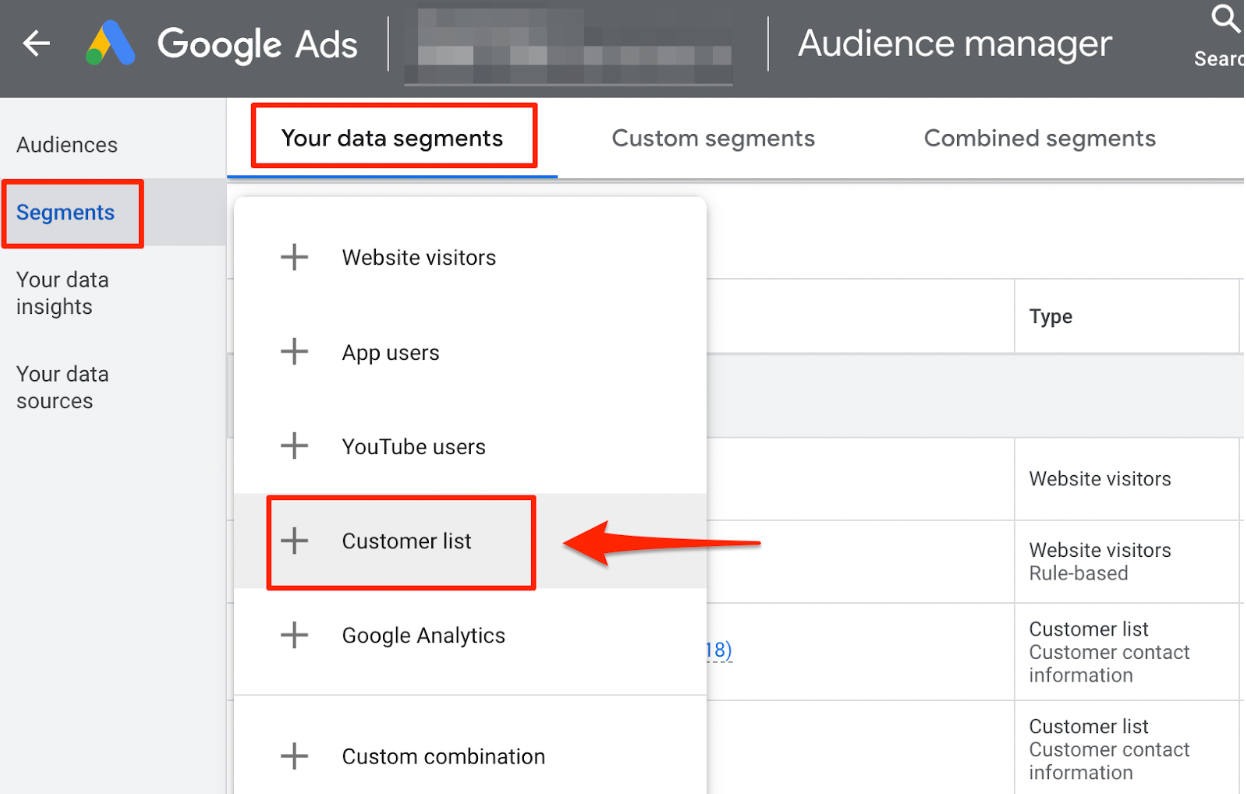
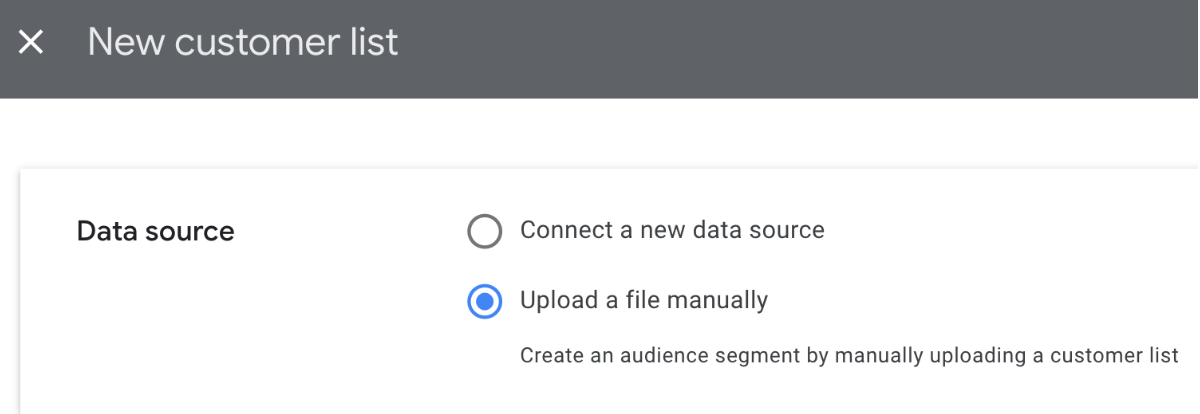
Next, you’ll choose a Data Source. The following steps are for manually uploading a file.
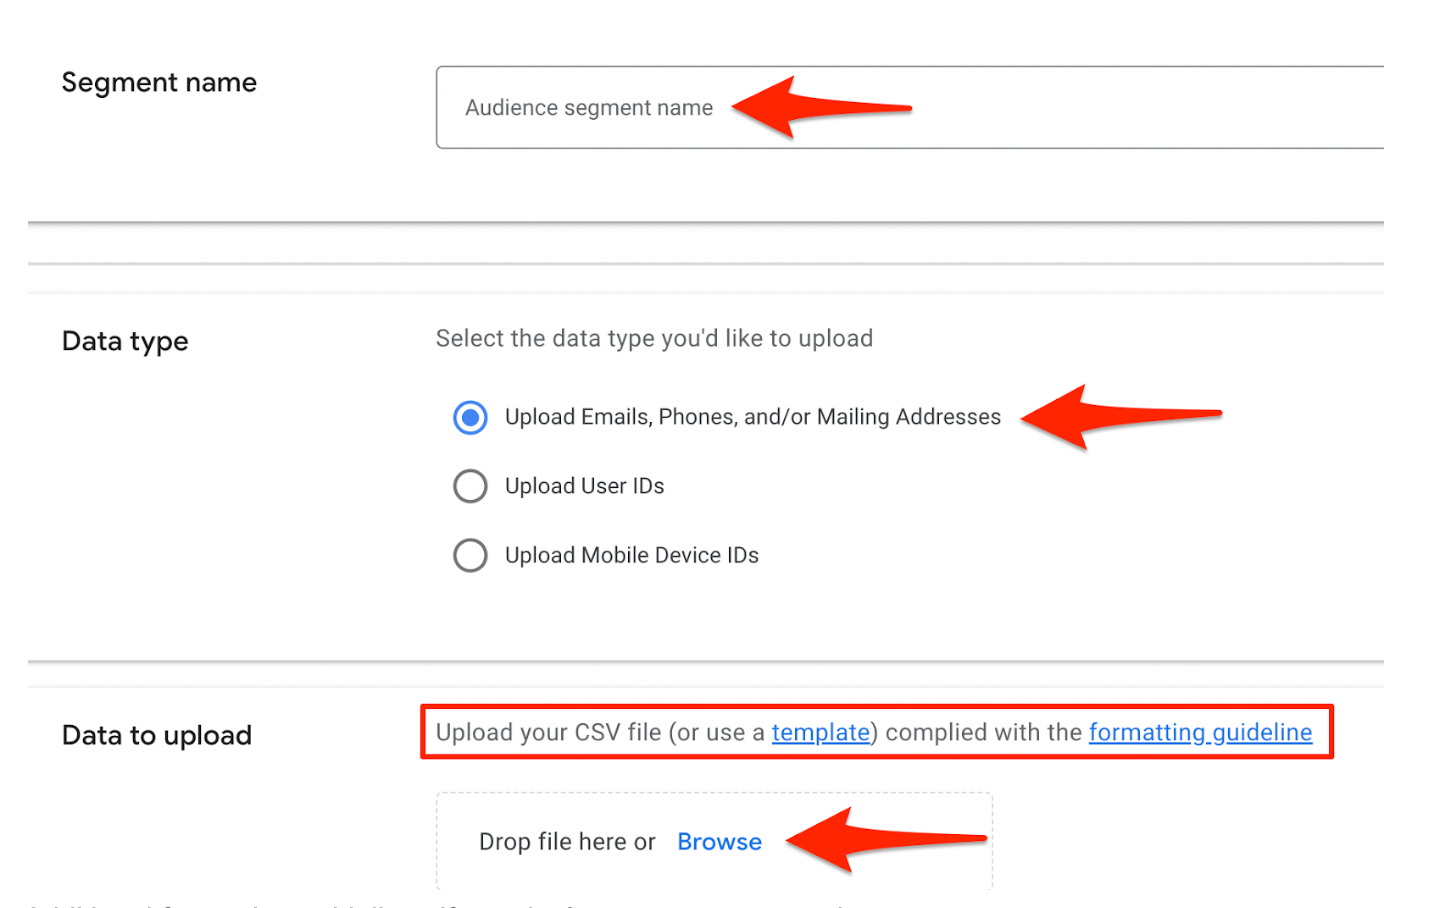
Make sure to name your Segment something unique that you’ll remember when adding it to a campaign, and then select the Data Type you wish to use. You can upload your CSV file (or use a template) to comply with the formatting guideline.
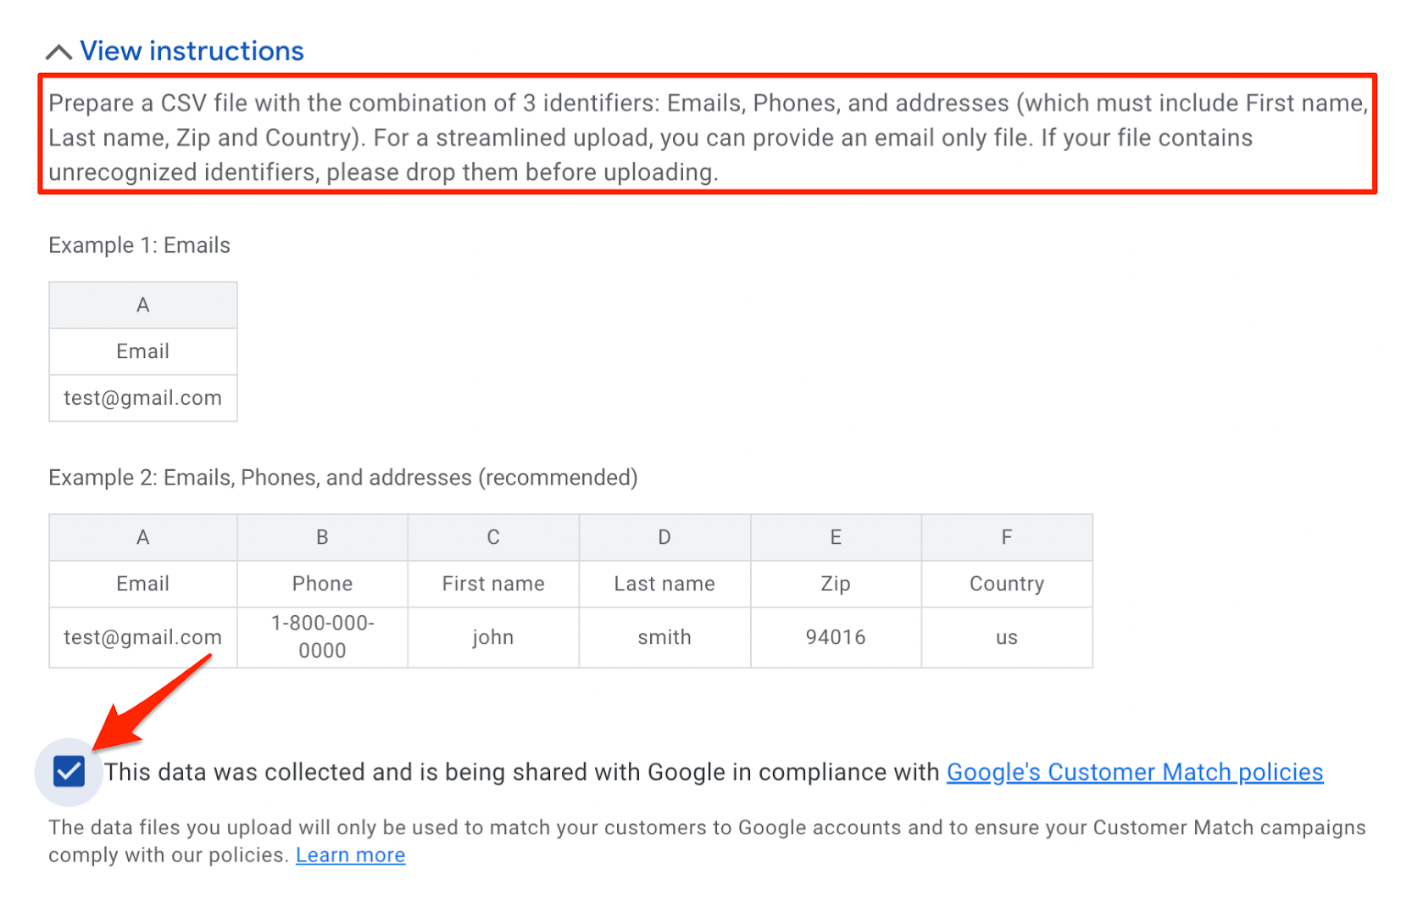
Additional formatting guidelines if you don’t want to use a template.

From there, select a Membership Duration, then Save and Continue.
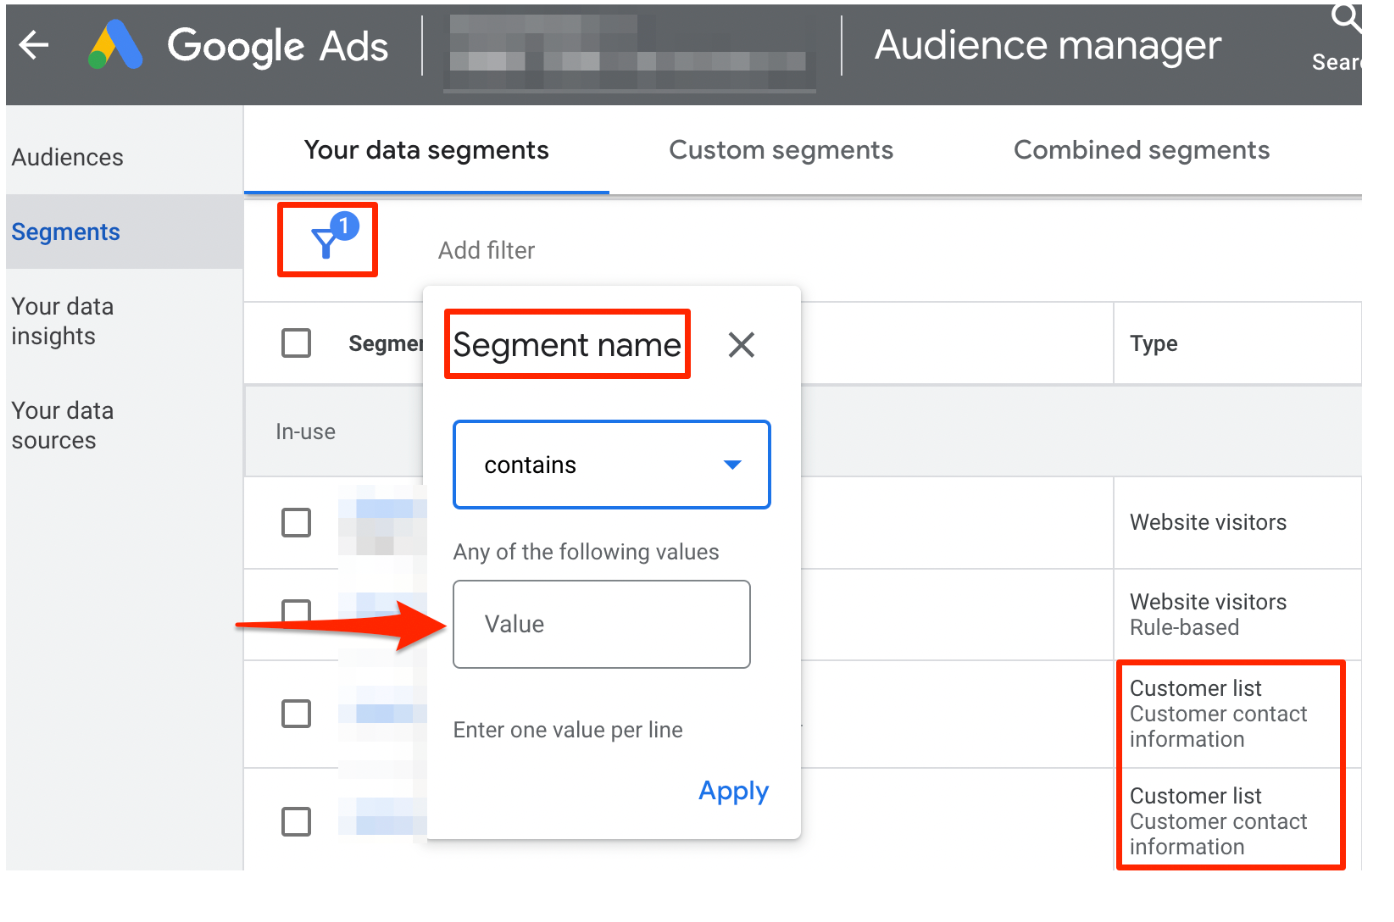
Once you save the audience list, you can monitor and see the new list by adding a filter for the Segment Name. If you have a ton of audience segments, this may be the easiest way to find your new list.
After the list is saved, Google takes ~24 hours to attempt to match your email list with their targeting data. You can add the audience to the campaign even while the segment is building.
LinkedIn Contact List: Step-by-Step Guide
For LinkedIn email match lists, they recommend uploading between 10,000 - 300,000 contacts for the best results.
If you work in several ad accounts, make sure to select the correct ad account inside of your LinkedIn Campaign Manager!
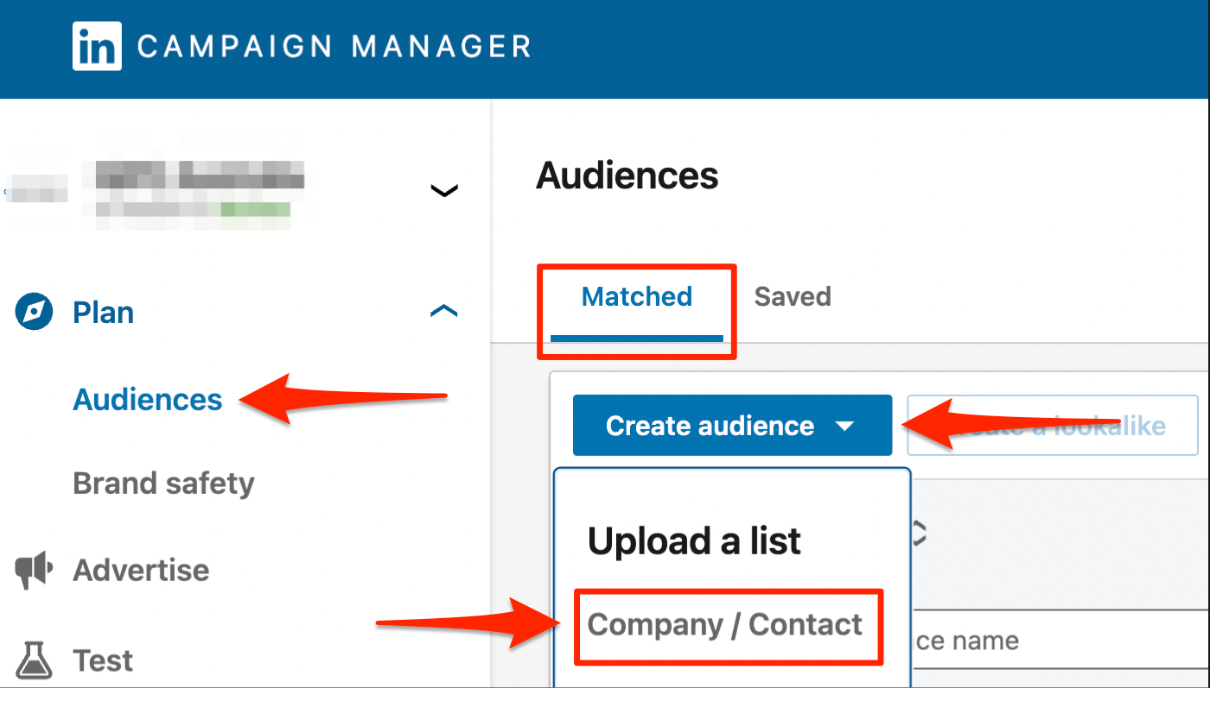
Begin the process by navigating to Audiences under Plan, then select Create Audience. You will want to choose Company/Contact below the Upload a List portion.
If you want to use the template LinkedIn provides, you can download the contact list template. Make sure to save the file as a CSV. Here are some additional requirements from LinkedIn:
Maximum file upload size is 20MB
Include only one contact per row
At least one field must be used in each row
Include at least one of the following: (a) email address, (b) first and last name, (c) mobile device id, or (d) google user id. Additional fields such as company, job title, or country increases the accuracy of the match.
Again, name the Prospect Audience something unique that you will remember when you go to add it to the campaign. Select Contact List as the List Type, select the list you created, and then Agree & Upload.


Once you’ve created the audience list, LinkedIn takes 24-48 hours to complete the matching process, in which you’ll be able to see the Status of the audience and the Match Rate. You can still add the audience to campaigns during the matching process, and ads should begin serving to the audience once the Status shows “Ready”.

Facebook (Meta) Customer List: Step-by-Step Guide
Inside of your Ads Manager account, navigate to Audiences in the left sidebar. Make sure to select the right ad account if you have access to several.

Select the Customer List Option, then Next.

Upload the list you created, name your Audience, then click Next.

Next, you can check the matched emails and Import & Create.

The last step is to click on “Done”!

You should then be able to see the audience you created to check its status, or as Facebook calls it “Availability”.
Did you find this step-by-step guide helpful? As platforms are constantly changing, this article will be updated!
